Counters
The LabKey Counters feature lets you manage access control by setting a predetermined number of entries for each user.
The LabKey Counters feature allows you to manage access control by setting a predetermined number of daily, weekly, monthly, or total entries for each user. Below, we will explain how to enable, manage, and disable this feature:
To activate this feature, follow the procedure described on the main [“Additional Features”](https://docs.labkey.io/en/docs/plugin/) page.
1. Activating Counters for a User
- Go to the “Users” menu and select “User List”.
- Add a new user or edit an existing one.
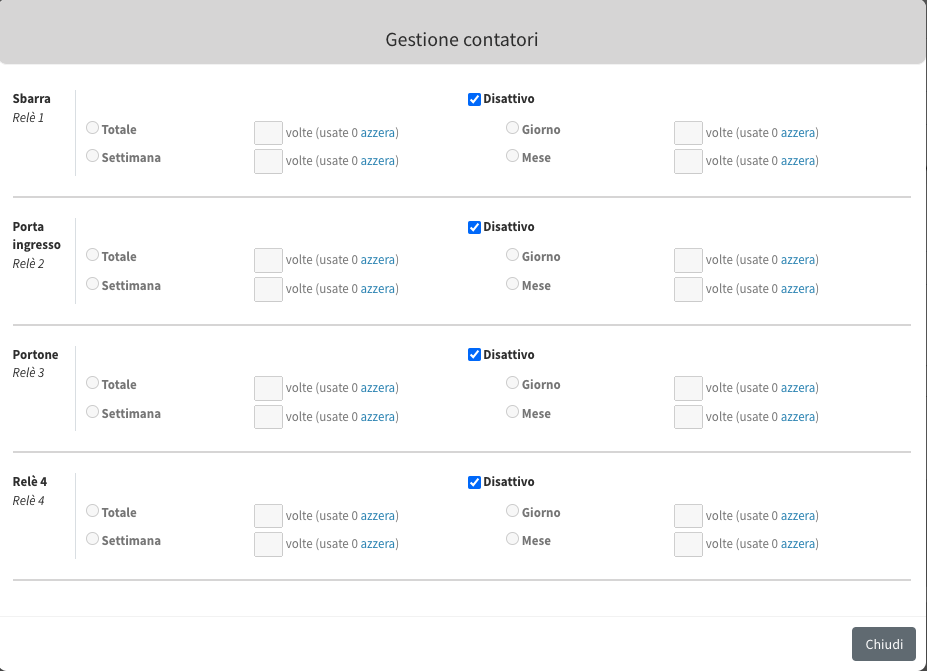
- In the section corresponding to the desired LabKey, click on “Manage Counters”.
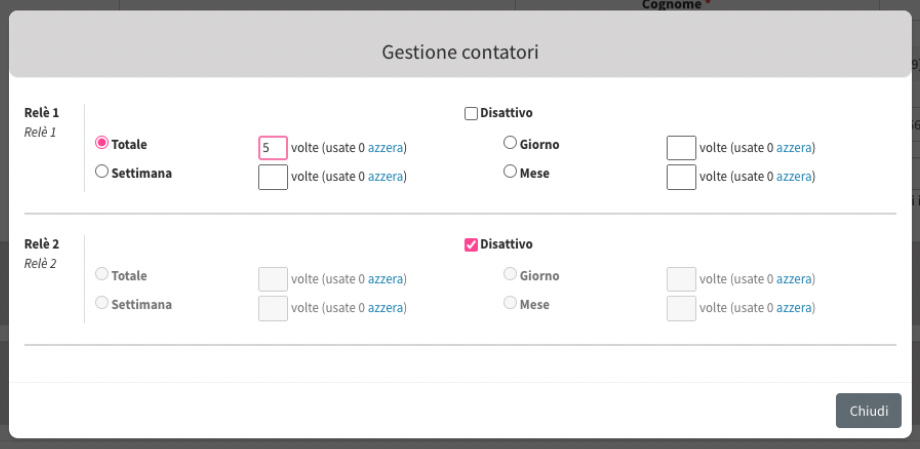
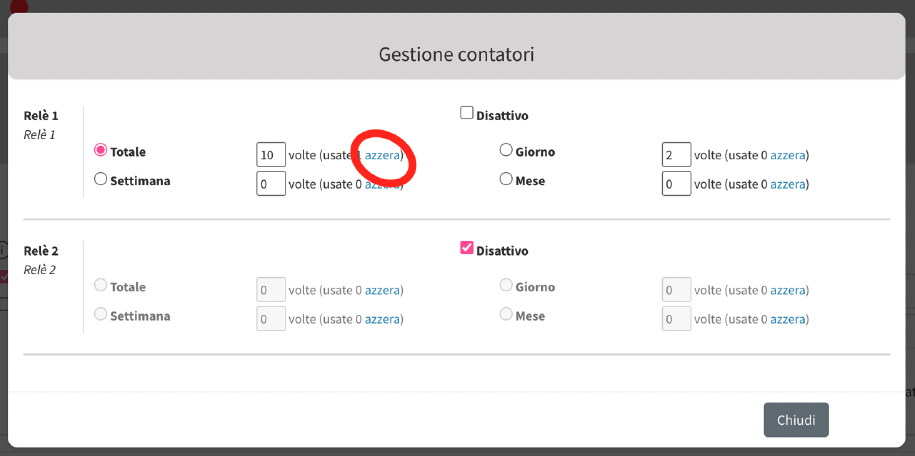
- In the popup window, enable the counters for the desired relays and set the number of accesses for the selected time period (Total, Day, Week, Month).
- Close the popup and save the changes.
2. Viewing Remaining Accesses
- Go to the “User List” section and click “View” next to the desired user.
- Next to the relays the user has access to, you can see in real-time the remaining number of accesses.
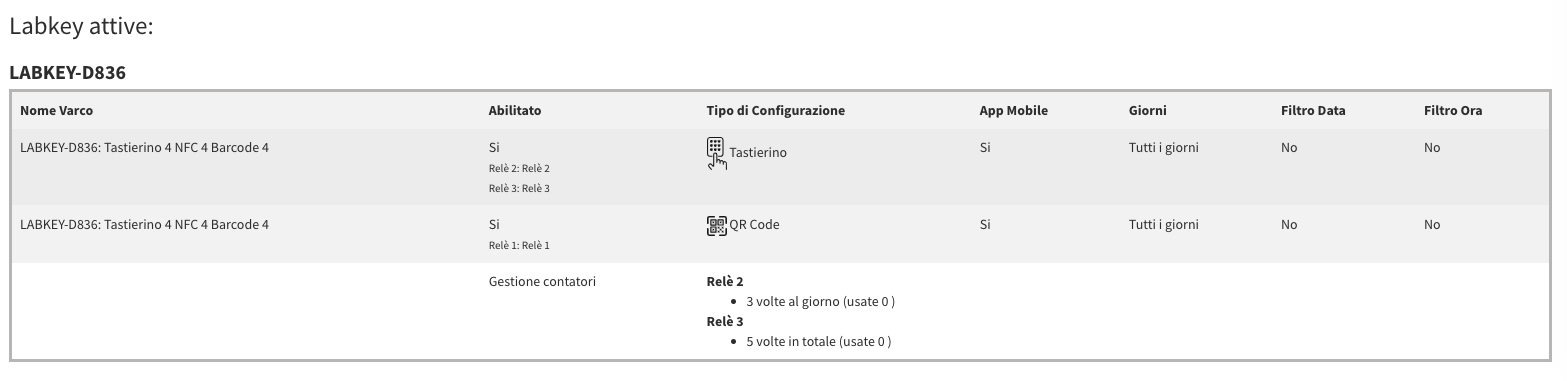
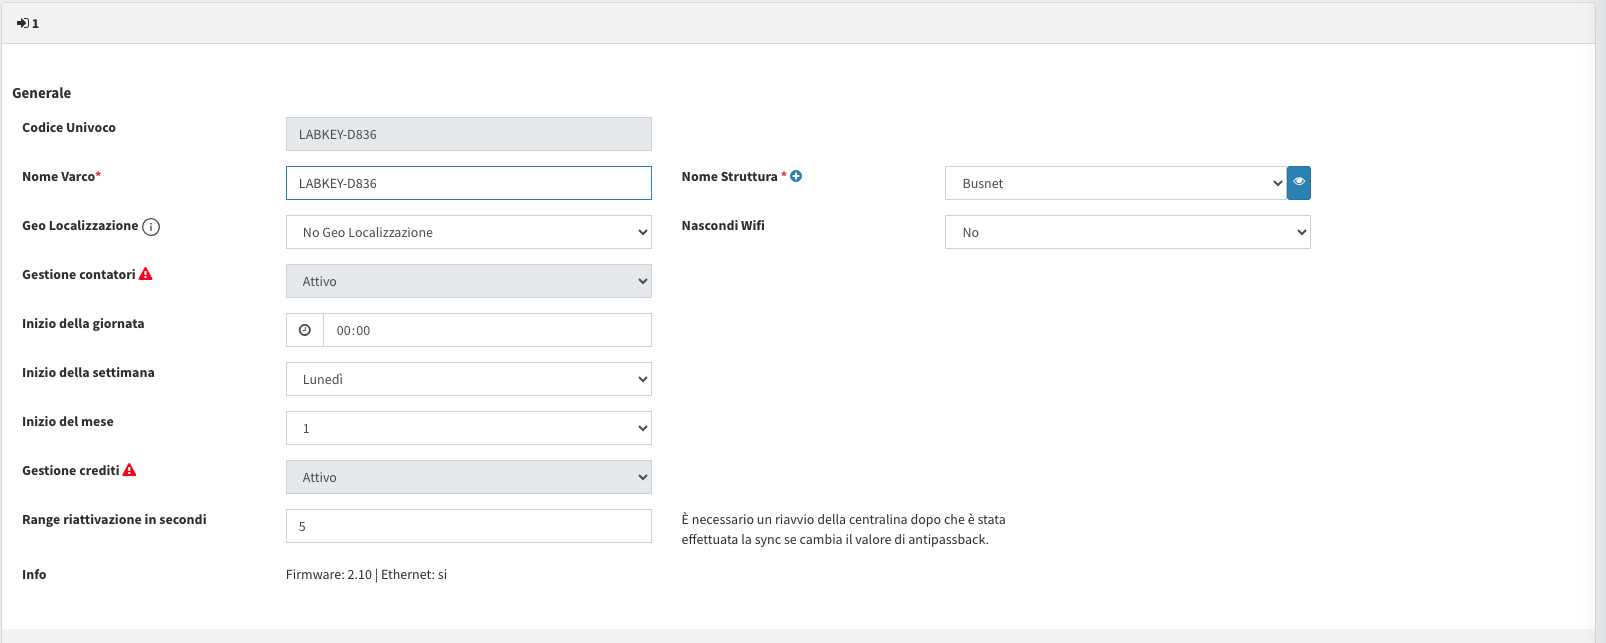
- If you select a time period such as “Day,” “Week,” or “Month,” the counter will automatically reset according to the parameters set in the corresponding LabKey under MyLabKey - “Edit” section (green pencil button).
3. Resetting Counters
Reset User Counters
- To reset counters for a user, go to “User List” and edit the desired user.
- Click on “Manage Counters” next to the LabKey name.
- Click “Reset”.
Hard Reset of All Counters Linked to the LabKey
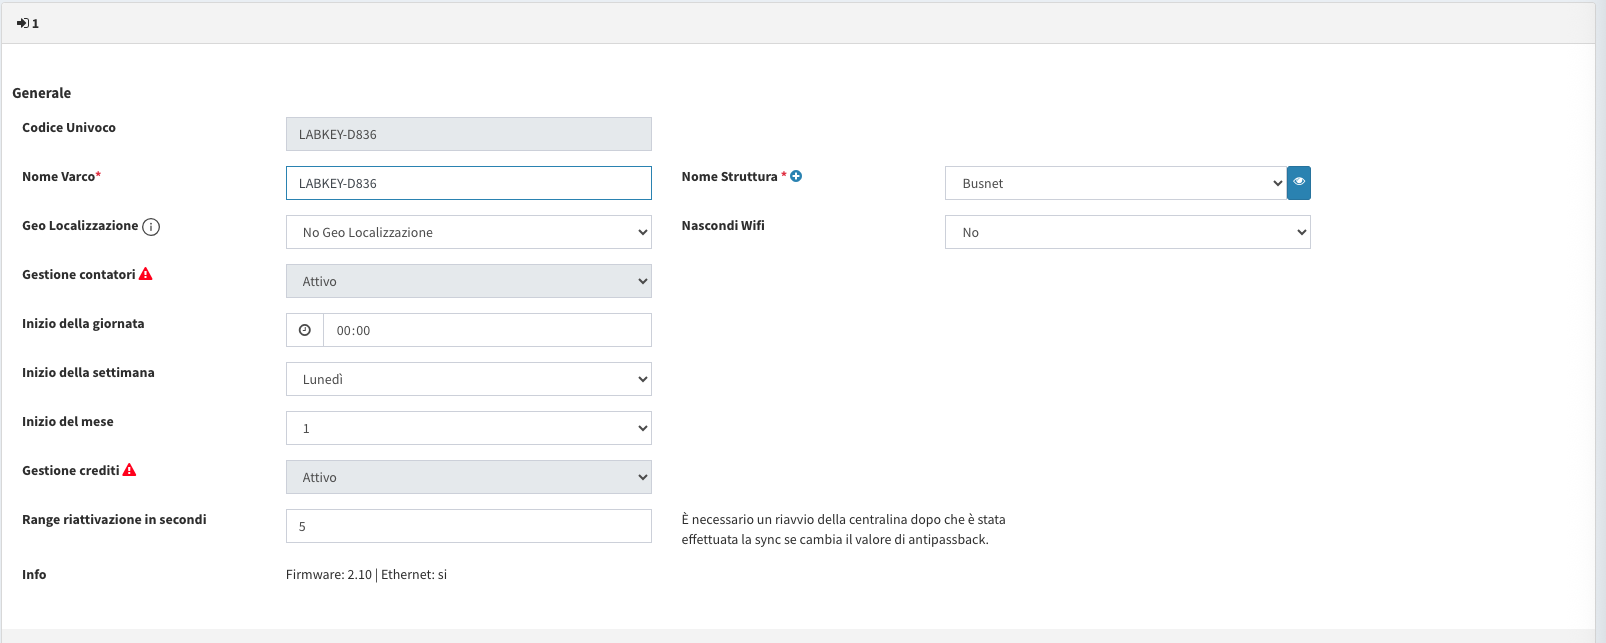
- Go to “LabKey” -> “My LabKey” and click “Edit” next to the desired LabKey.
- In the edit screen, click the red triangle button next to “Manage Counters” and confirm.
- Ensure the LabKey is online to complete the operation successfully.
4. Deactivating Counters
Deactivate User Counters
- To deactivate counters for a user, go to “User List” and edit the desired user.
- Click on “Manage Counters” next to the LabKey name.
- Check the “Inactive” flag.