Managing LabKey
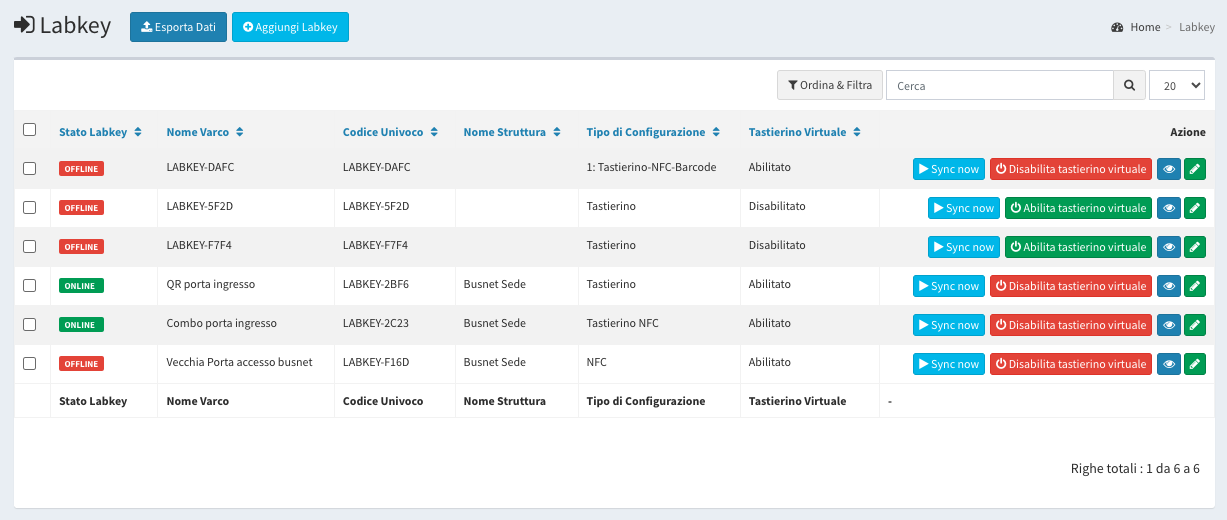
In the My LabKey > LabKey section you can view the list of your control units and a summary of their information:
- LabKey Status:
- Online: the control unit is connected to the Wi-Fi network.
- Offline: the control unit is not connected to the Wi-Fi network.
- Gate Name: you can customize the name of the control unit.
- Unique Code: the unique identifier code.
- Structure Name: the structure associated with the control unit.
- Configuration Type: the associated control devices.
- Mobile App: whether the control unit is enabled for remote and/or BLE opening via the mobile application. See the section Mobile App.
Editing a Control Unit
By clicking the green ✏️ button (next to each control unit row) you can make the following changes:
- General Settings
- Relay Settings
- Control Device Settings
General Settings
In this section you can customize and edit the general information and settings of the selected control unit.
Note: the “Unique Code”, “Control Unit Type” and “Info” fields cannot be edited.
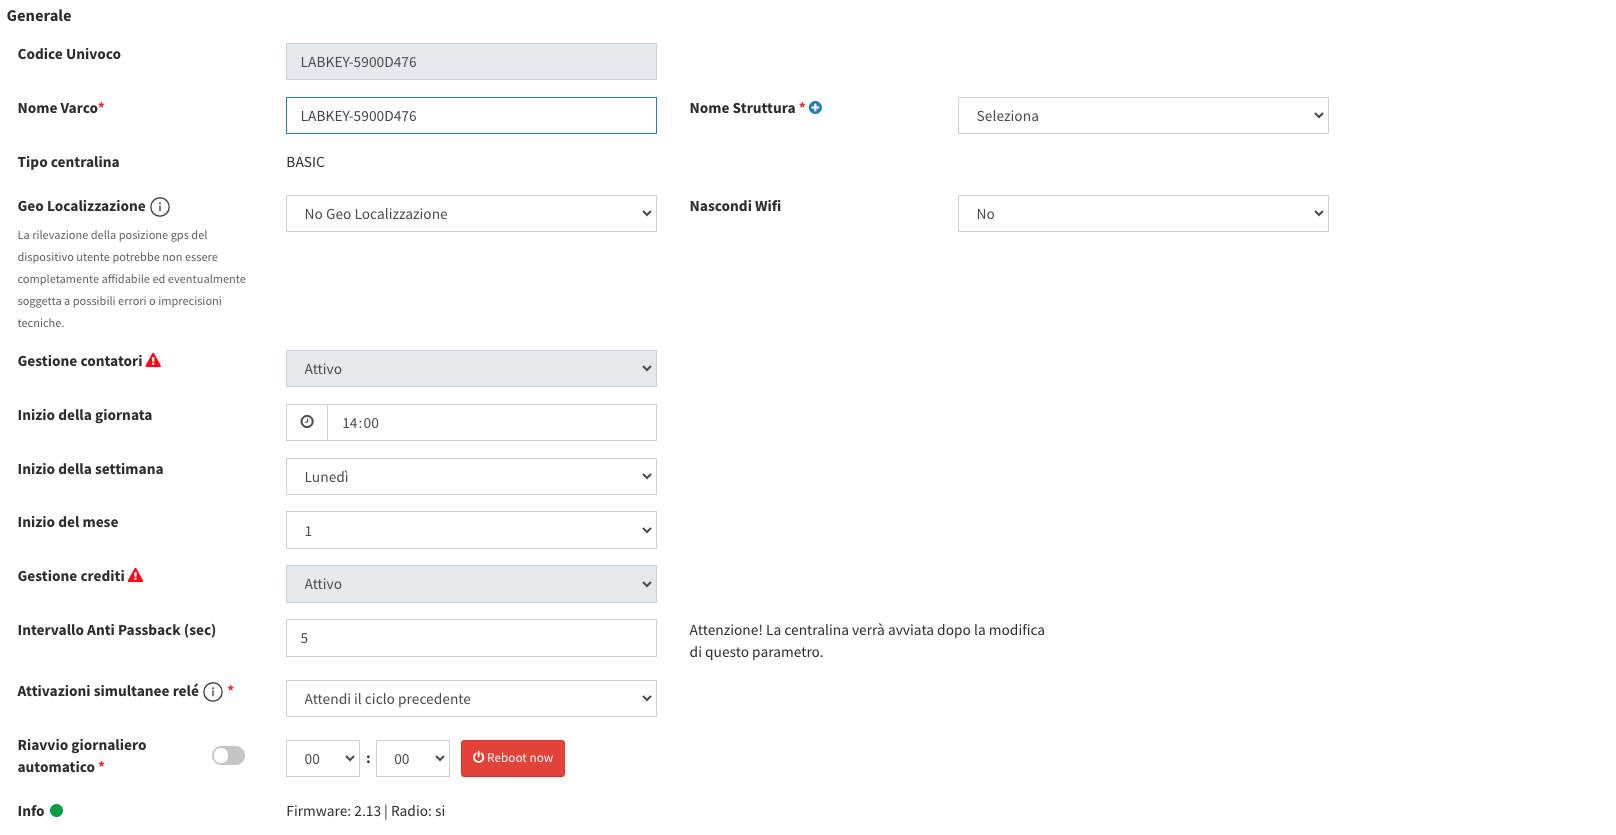
- Edit the name of the LabKey in the “Gate Name” field.
- Associate the control unit with the reference structure: use the “Structure Name” dropdown menu to select the correct structure.
- Set the allowed distance in meters for the geolocated lock feature for using the remote opening command.
- Decide whether to hide the Wi-Fi of the control unit, i.e. you can make the control unit not appear among the available Wi-Fi networks.
- Set the basic parameters of the Counters feature (if active).
- Check the activation of the Credits feature (if active).
- Set the parameter, in seconds, for the Anti Passback interval. A restart of the control unit is required after syncing if the anti-passback value has changed. Feature available for control units with firmware version 2.10.
- Customize the management of simultaneous relay activations.
- Select “Wait for previous cycle”: requests are queued. If a relay is already active, the user sees the pending status (yellow) until the cycle ends.
- Select “Ignore already open relays”: available relays are activated immediately without considering those already activated.
- If you wish, set an automatic daily restart (by selecting the time) or perform the restart instantly.
Relay Settings
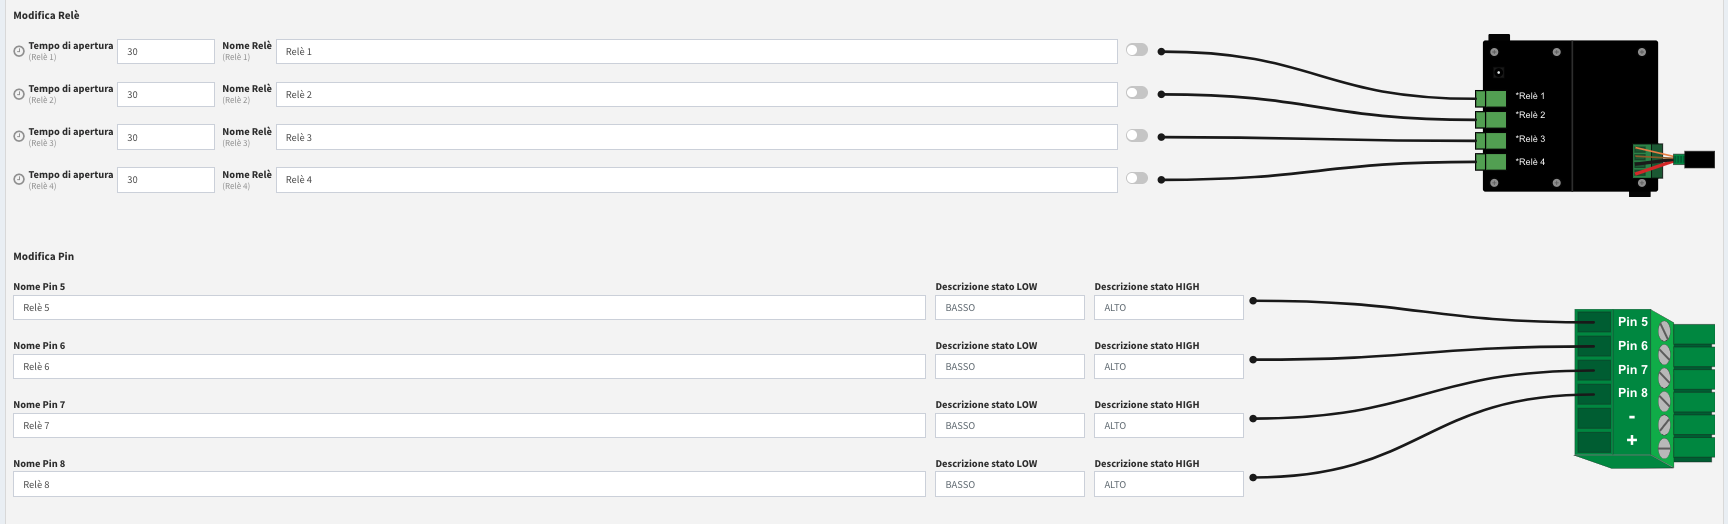
In this section you can customize the opening times of the relays (in seconds) of your control units, as well as their names.
Using the button next to the “Relay Name” field, you can manually activate the relay and keep it active as long as the button is blue.
ATTENTION
If you have a control unit with the GPIO input connector for sensor management, in this section you can also edit the PIN names of the connector and give an intuitive name to the PIN state to make daily management of the device and system easier.
Control Device Settings
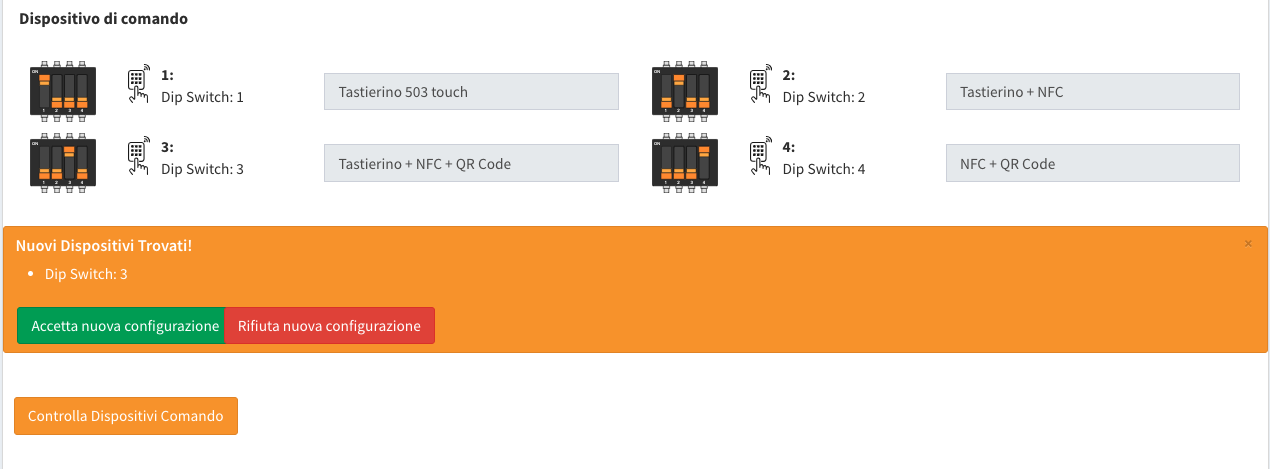
Within this section you can also edit the names of the control devices connected to the control unit with the DIP switches set during installation. If needed, consult the DIP Switch Guide.
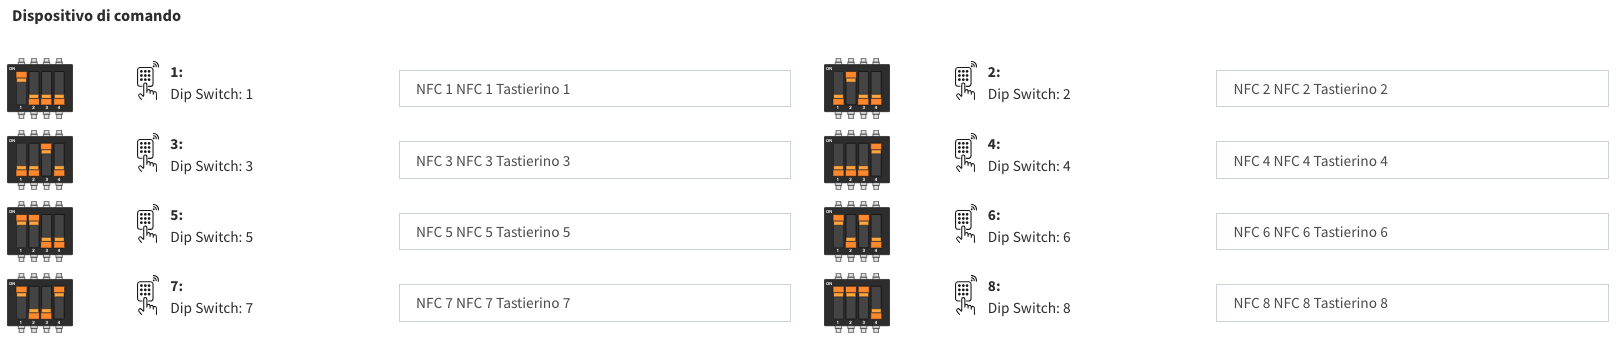
For a reader with QR code technology, you can also decide the QR code reader’s operating mode. For more information, see the section dedicated to the QR code reader models: MINI and Glass.

Viewing a Control Unit
With the blue 👁️ button, in the row corresponding to the desired control unit, you can view all the information listed above in the “Editing” step.
Furthermore, in the Relay Settings section, you can see the activation status of the relays or of the GPIO input connector pins, thanks to the button, and also request an update with the blue “Update Relay/Pin” button.
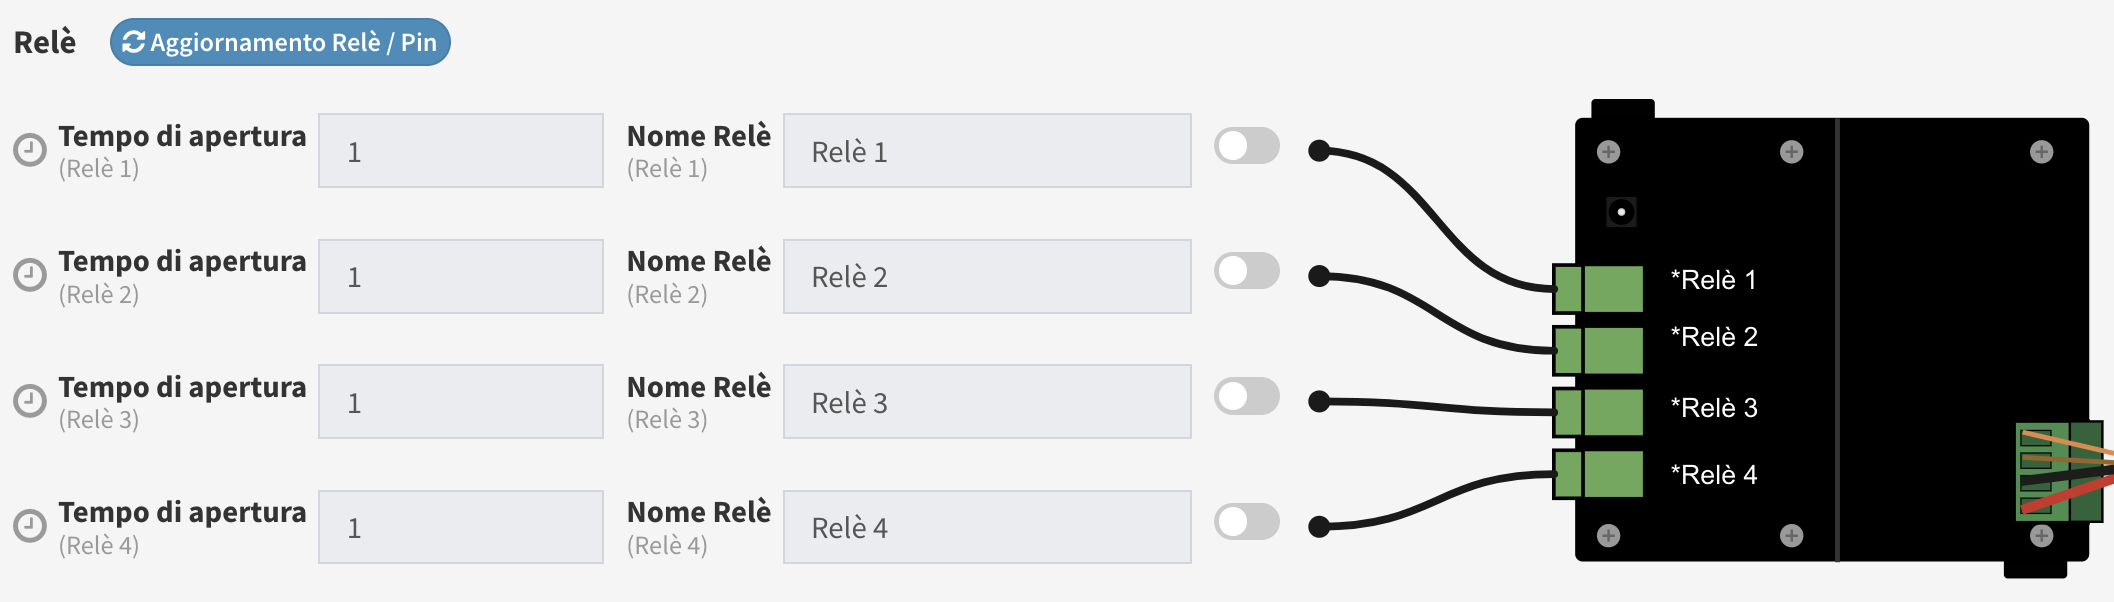
In this section you can also start the “Check Control Devices” procedure.
Check Control Device
Procedure not required with LabKey Remote control units.
ATTENTION: if your control unit is the Remote model, the default available remote command corresponds to the relay number of the control unit.
Premise: Each LabKey control unit must be connected to one or more control devices, each indexed with a DIP switch numbered from 1 to 8. Initially, the control unit will automatically recognize the connected devices at startup. However, if devices are connected later, a manual association can be performed.
Manual Association Procedure:
- Select the control unit powering your readers with the DIP switches.
- Click the blue eye icon.
- Scroll to the “Control Devices” section and start the recognition procedure by clicking the orange “Check Control Devices” button.
- Once the procedure is complete, reload the page.
- Check the configuration detected by the system.
- Click the green “Accept New Configuration” button.
Troubleshooting: If the devices do not appear:
- Verify that all control devices are receiving power.
- Make sure the cables are connected correctly.
- Check that the DIP switches are set without duplicates.
Attention: If the control devices are already configured and you press the check button, the control unit will be initialized, resetting all custom command names. Use this option with caution to avoid losing previously configured settings. This procedure allows you to manually verify and associate control devices with your LabKey control unit, ensuring accurate and reliable access control.