Adding a New User
Create users and their access codes with custom permissions.
If you purchased a LabKey BASIC / PRO / LTE Remote control unit, first activate remote opening via the mobile app. Find out how in the Mobile App section.
This procedure allows you to add a new user to the system, customizing their settings according to your specific requirements.
Adding a New User
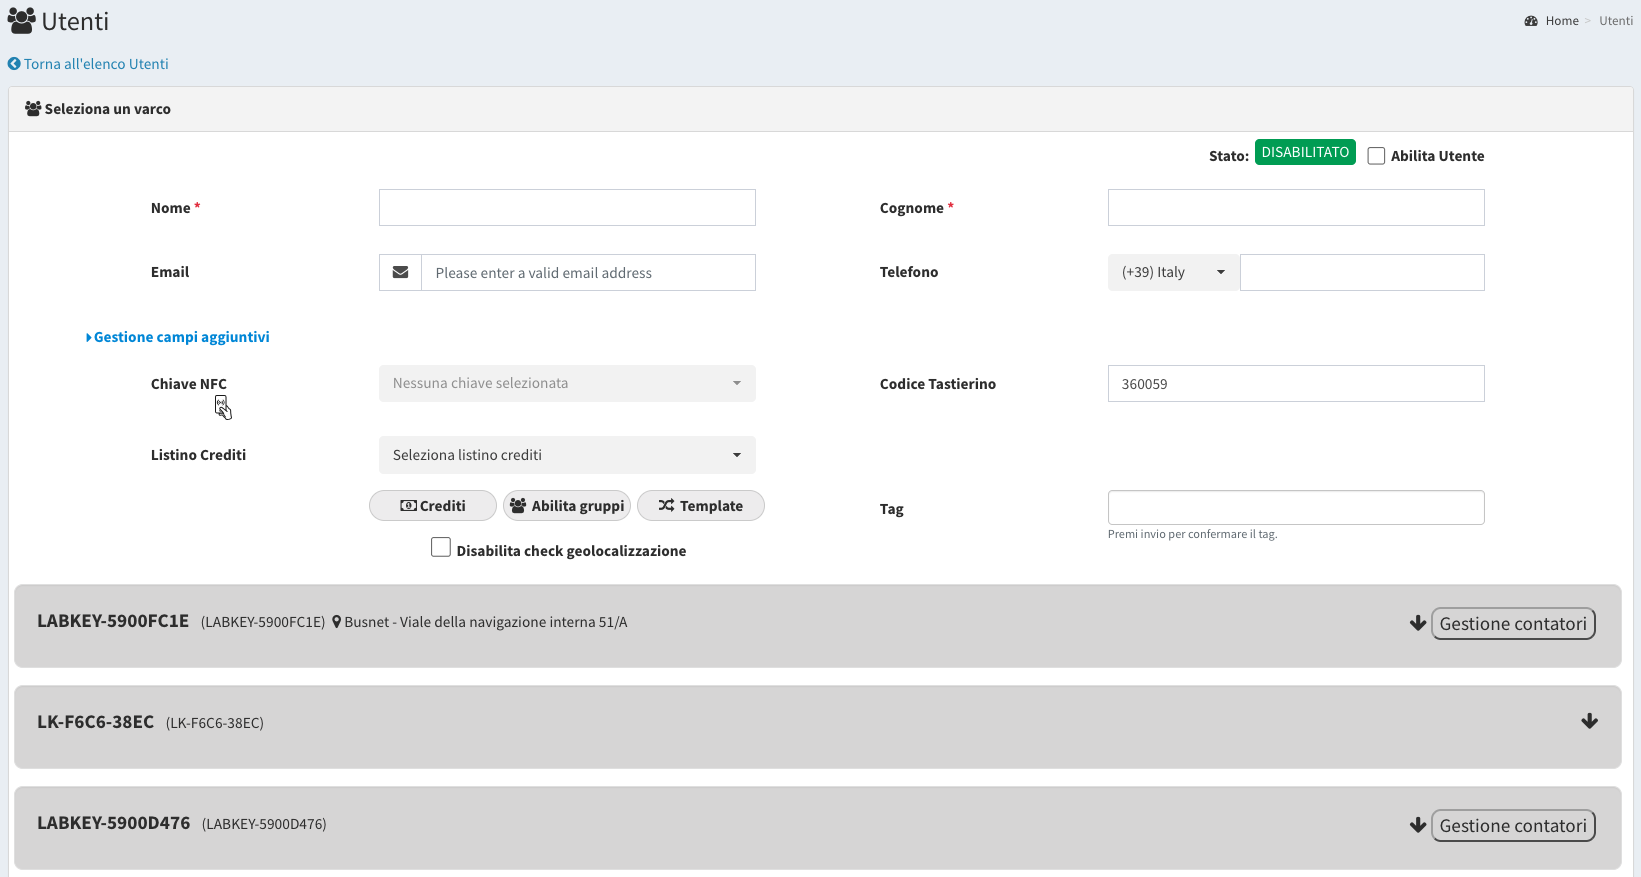
- In the sidebar, go to “Users” > “User List”
- Click on “Add New User” to start the insertion procedure.
- Fill in the required information, including the phone number (mandatory if you want to enable remote opening via the mobile app or if you have a QR Code control device). The phone number will also be used to generate the QR Code.
- Also fill in any custom fields for the user profile. For more information, see the Custom Fields add-on feature section.
- If you have an NFC model, associate an NFC key. Otherwise, enter a 6-digit code if the model has a keypad. To understand how to identify the NFC gadget, see the Associating and Recognizing NFC Gadgets section.
- You can enter an optional “tag” to categorize the user, for example as “employee” or “student”.
- If you want to assign the user to a group, click “Enable Group Features”. This allows the user to inherit the permissions set in the corresponding group. (See the User Groups section for more details.)
- If you want to assign the user to a template, click “Select Template”. This lets you choose the desired template from the dropdown menu and enter any time filters for the validity of the user’s permissions (you can also leave it unselected).
See the section dedicated to the Template feature.
- If you want to use the credits feature, you can configure it for the user in the dedicated “Credit List” and “Manage Credits” sections. For more information, see the section dedicated to the Credits add-on feature.
- If you want to use the counters feature, you can configure it for the user in the dedicated “Manage Counters” section. For more information, see the section dedicated to the Counters add-on feature.
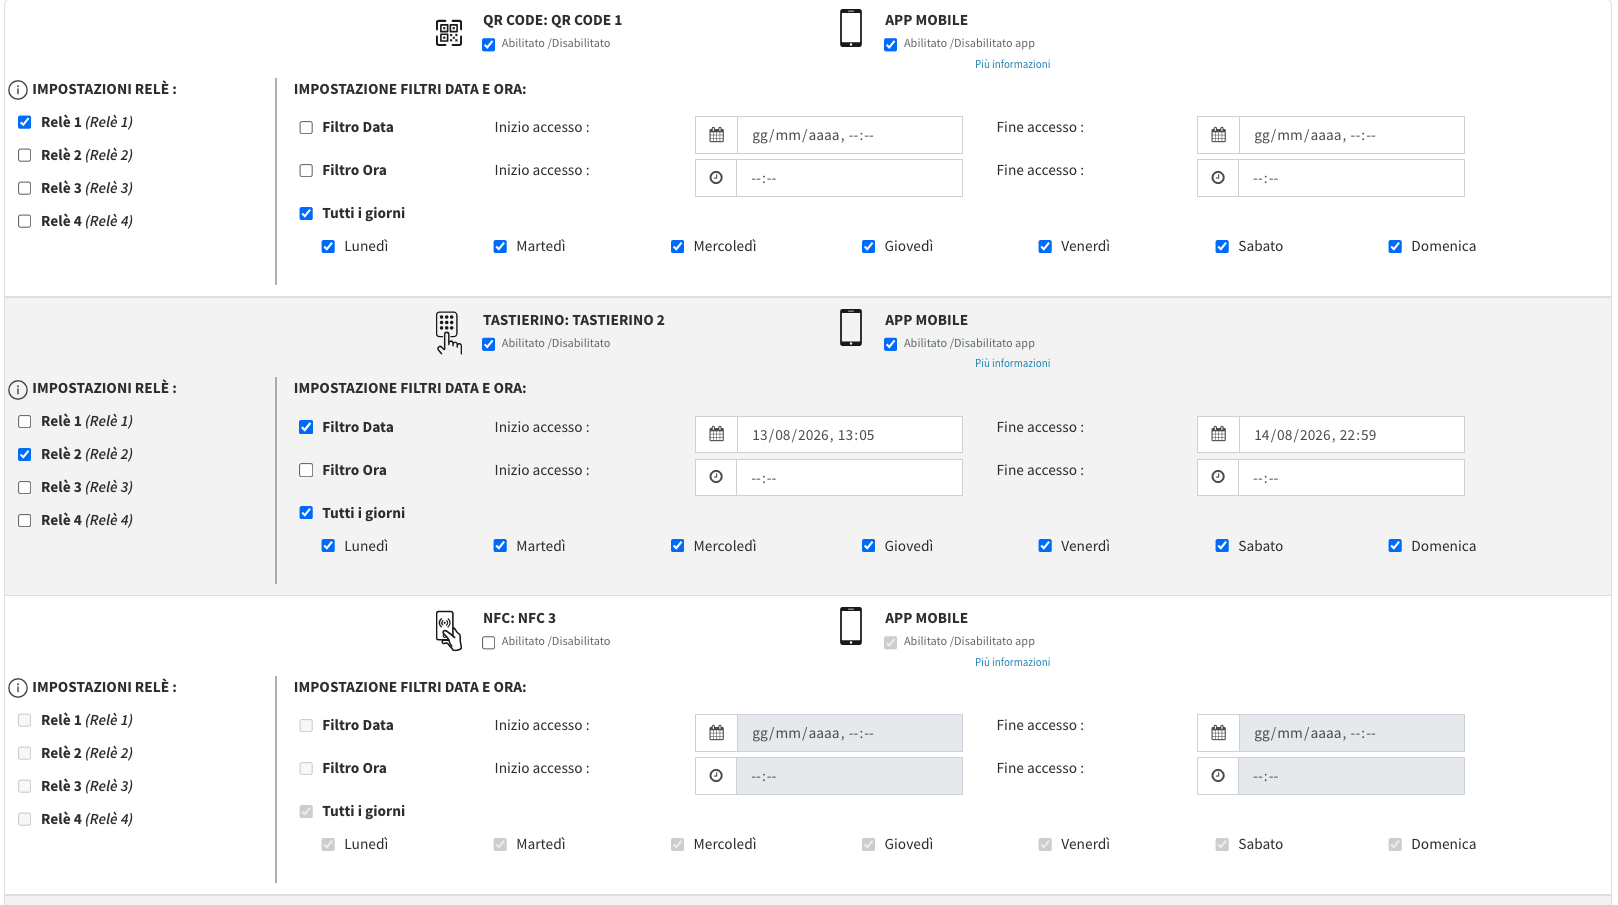
- Customize the standard access for the user by setting the access permissions for readers and relays, along with any time filters. (See below.)
- Decide at the top right whether to create the user in “Disabled” or “Enabled” status.
- Decide whether you want to exclude the user from geolocation control if they use remote opening via the mobile app.
Customizing the Access Time for a User:
To customize a user’s access period, follow these steps during user creation:
During user creation, you will find the list of control units associated with the panel. Click on the name of each control unit to open its settings. By default, all control units are disabled for each user.
Check the “Enabled” box under the desired reader model (e.g., QR Code). If the control unit has multiple readers connected, you will see a row for each technology of each reader.
ATTENTION: if your control unit is the Remote model, the available remote command to select corresponds to the number of relays on the control unit.
In each row, customize the access time for that reader. Select the relay you want to activate with that particular technology of that control device.
For each reader, select the entry permissions for the user. You can choose between date ranges, time ranges, days of the week, or combinations of these permissions.
After configuring the desired permissions, click “Save” to apply the changes.
To verify the newly created code, wait a few seconds for the reader to flash yellow and then test the code/card.
Register NFC keys in the Manage Panel and pair them with the corresponding users.
Export and create the access QR code for the user, within the Manage Panel.